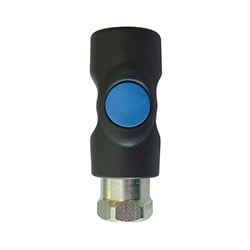
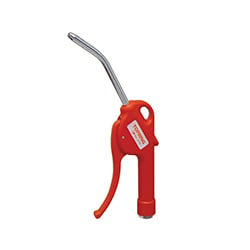
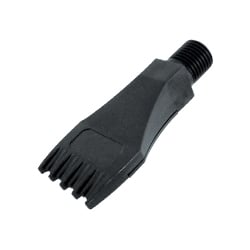
Back
RÉSEAUX D'AIR 101
Back
POURQUOI CHOISIR L'ALUMINIUM
Back
PLANIFICATION D'UN RÉSEAU
Back
INSTALLATION D'UN RÉSEAU
Back
CERTIFICATIONS
Back
SYSTÈME 100% EN ALUMINIUM
Back
BLOGUE
Back
ÉTUDES DE CAS
Back
LIVRES BLANCS ET GUIDES PRATIQUES
Back
FORMATION
Back
NOTRE CHAÎNE YOUTUBE
Back
QUESTIONS COURANTES
Back
CATALOGUE NO18
Back
RÉSEAUX D’AIR TOPRING S08
Back
SOLUTIONS DE SÉCURITÉ
Back
MAINTENANCE AUTOMOBILE
Back
RACCORDS ET TUBES PNEUMATIQUES
Back
TOUS LES CATALOGUES
Back
À PROPOS DE NOUS
Back
CONTACTEZ-NOUS
Back
QUESTIONS COURANTES
Back
POURQUOI TOPRING
Back
NOUVELLES
Back
TRAVAILLER AVEC NOUS
Back
LA CULTURE TOPRING
Back
VIVRE L'EXPÉRIENCE
Back
NOTRE ÉQUIPE
Back
POSTES OUVERTS
Back
CANDIDATURE SPONTANÉE
Back
MON COMPTE

Series 61 - Instruction Manual

Table of Contents

  1. General Instructions
  2. Spray Guns
  3. Specialized Spray Guns for Vehicles

General Instructions

Technical Specifications, Replacement Parts and Repair Kits

To consult any technical specifications, list of available replacement parts and repair kits for your product please consult the product page by searching for the product SKU in the website search bar.

Spray Guns
61.210 Industrial Pressure Washer 1/2 BSPP

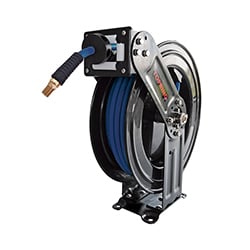
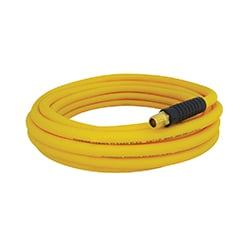
Compatibility: Designed for use with a water hose reel or garden hose with a 3/4 (M) GHT outlet. For proper connection, use a 3/4 (F) GHT x 1/2 (M) NPT fitting (41.209) and apply PTFE tape for optimal sealing.


Operation

  • Connection: Ensure a firm connection between the spray gun and the equipment by using sealing tape.
  • Continuous Operation: The lever can be wedged in an open position using the hook for prolonged use without causing discomfort.
    • Directional Jet: Press the lever for a directional jet.
    • Cone Jet: Release the lever for a 60° cone jet.

61.210-s61-instructions_pagesweb_2025-02_image01

Troubleshooting

•    Leaking Connections: Check all connections and ensure PTFE tape is applied correctly. Tighten fittings as needed.
•    Low Water Pressure: Verify that the water source is fully open and check for any obstructions in the hose or spray gun.

Maintenance

  • Regular Inspection: Regularly inspect the spray gun for wear and damage. Immediately replace worn or damaged parts.
  • Cleaning: Clean the spray gun after each use to prevent clogging and debris buildup. Store it in a dry place to avoid rust and corrosion.

Warning

  • Pressure Limitations: Do not connect the water spray gun to any equipment that produces pressure higher than the gun’s rated working pressure.
  • Safety Precautions: Do not aim the gun directly at people or spray water upward.
  • Always switch off the water source when the gun is not in use or during maintenance.
  • By following these instructions, you can ensure safe and effective use of your multi-purpose water spray gun. Regular maintenance and proper operation will extend the life of the product and enhance performance."
Specialized Spray Guns for Vehicles
61.115 1.2 L Brake Bleeder 1/4 NPT

With this brake bleeder, a single person can efficiently bleed brake systems. The process is quick, clean, and simple. The brake fluid is drawn into the reservoir, preventing unnecessary spills.

Operation

* Safety First: Always wear safety goggles and gloves to protect yourself from brake fluid, which is highly caustic.

  1. Always make sure there is enough brake fluid in the system during the operation.
  2. Connect the brake bleeder gun to the compressed air line system.
  3. Lift the vehicle using a jack and securely place it on jack stands. Remove the wheels to access the brake calipers.
  4. Clean any debris around the bleeder screws and brake fluid reservoir to prevent contamination.
  5. Set the brake bleeder’s rubber pipe on the brake system’s bleeder valve and loosen the valve with a box-end wrench.
  6. Activate the handle of the brake bleeder. This creates a partial vacuum in the container, sucking the brake fluid into the container.
  7. Continue the process until the brake fluid is free of air bubbles, which can be seen through the clear hose. Once air bubbles are no longer present, tighten the bleeder valve and remove the rubber pipe.
  8. Repeat the procedure for each brake caliper, ensuring all air is removed from the system.
  9. Check the brake fluid reservoir periodically and top it off as needed to prevent air from being sucked into the system.
  10. After bleeding all brakes, test the brake pedal for firmness. If the pedal feels soft or spongy, repeat the bleeding process to remove any remaining air bubbles.

Maintenance

  • After use, it is recommended to perform maintenance and cleaning to ensure the brake bleeder remains in good working condition for future use. Clean all components and store the brake bleeder in a dry, secure place.
  • Proper Jacking Points: Consult your vehicle’s manual for proper jacking points to avoid damage.

Warning

*Do not touch the brake pedal while bleeding the brakes.

  • Use the Correct Brake Fluid: Ensure you use the correct type of brake fluid as specified by your vehicle’s manufacturer.
  • Avoid Contaminants: Keep the brake fluid reservoir cap closed when not adding fluid to avoid introducing contaminants into the system.

Still Having Issues?

Our customer service team is ready to help! Get in touch with an advisor at 1-888-542-1799 or click on the link below to open or contact page.